The benefits of playing guitar with one finger
Have you ever tried to play a guitar solo using only one finger? I hadn’t either until my friend challenged me to post a video of me doing one on TikTok. Not wanting to waste an hour coming up with a one-finger guitar solo just for TikTok, I started thinking: are there any legitimate techniques or ways we can practice on the guitar that uses only one finger? Turns out there are!
Visualise the shape of scales using one finger
The first thing that came to mind is something I’d already been doing with my students. When we learn scales and patterns on the guitar, part of our memory of them is connected to the finger we use to play the scale. We learn the shape of the scale in relation to the movements we do with our left hand as we play it. In the case of a scale, the movements we are learning are the fingerings and the specific way we move between them as we play the shape across the strings. However, we don’t want our visualisation of the shape to be dependent on us having our fingers in a specific place. We want to visualize the shape for the shape’s sake, not because we remember the order of fingers we are supposed to use when we play it.

Practising a scale with one finger (I use my index finger) allows us to focus on just the shape and where the notes themselves are, rather than covering the shape with your hand and focusing on your fingers.
If we’re doing this, we don't want to just be learning the position you are putting your finger on the fretboard. The whole point of this exercise is to begin to associate the actual notes you are playing (e.g. E, C, G) with their position in the scale. Practising these shapes with one finger without associating the notes will still help you visualise the shape. But, you’ll only get half of the benefit.
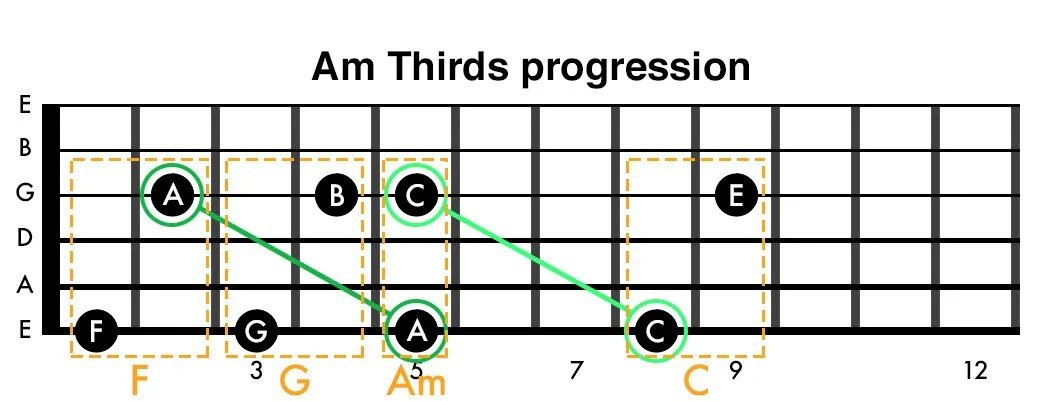
A similar thing can be done with Third shapes. Knowing what notes we are playing in these shapes will enhance our understanding of the progression. A greater understanding of what’s happening will allow you to begin to do more with the shapes in your playing.
As before, we don’t want to rely on the position of our fingers to recognise the notes under them. Practising identifying the notes with only one finger helps you recognise these notes for what they are independent of the shape you happen to be playing them in at the time.
If we do this with the progression below, we notice that there are actually two instances of the notes A and C. Suddenly, we’re able to appreciate that these notes are common between multiple chords. We’re indirectly improving our knowledge or relevant music theory. We’re also able to recognise where two different A or C notes are in relation to each other. Identifying and remembering these relationships will help us better understand chords, more easily find root notes when we’re improvising, and better remember songs as we now have more ‘reference points’ we cam use to remember a lick.
Rolling your finger
In the example above, we learned how to use one finger to enhance or practice by allowing us to better visualise the shapes and patterns we are learning. However, there are also a few ways we can use one finger in real-life situations when we are actually playing the guitar.
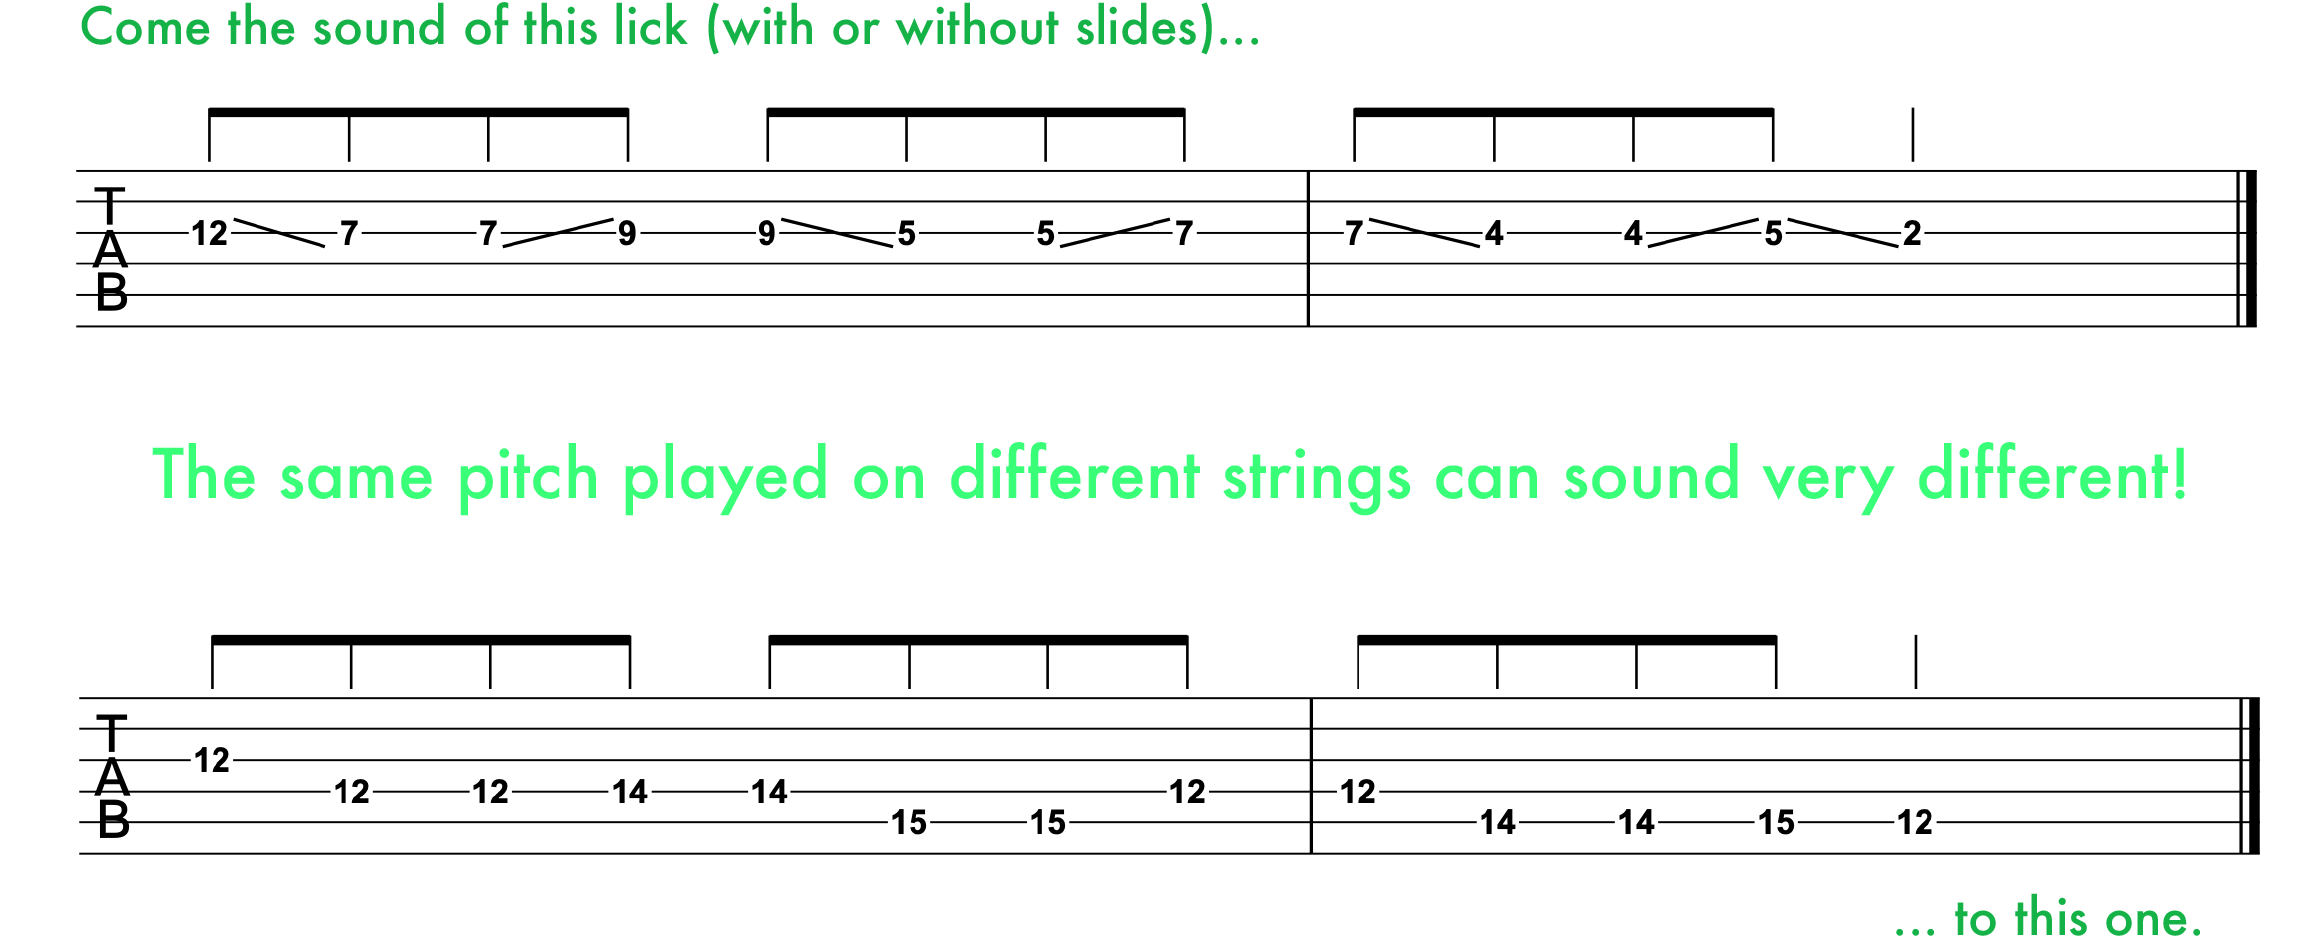
When we are playing the guitar, we want to try and avoid swapping strings in the same fret with the same finger. No matter how good you are at this, there will always be a break in the sound as your finger leaves one string and comes down on the other string. Sure, if you do it quickly, it will be a quick break. Maybe a less obvious break. But it’s still a break and it will sound cleaner if you’re able to get rid of it. That’s where rolling your finger comes in. This technique allows us to transition easily between strings in the same fret, using the same finger, without having to deal with a break in the sound.
In the example above, you can see the note on the first string is played using the tip of the finger. The finger is then rolled down and flattened in order to use the pad of the finger to play the note on the second string. The tricky part of rolling your finger is developing a feel for the correct placement of your finger, so you only ever hear the note of the string we want to be playing. Rolling your finger incorrectly will result in you hearing both strings sounding at the same time.
Finding an exit
There’s a variation on the finger rolling technique we can use to get ourselves out of a tricky situation if we’re playing a lick and realise we’ve messed up the fingering. As we mentioned before, we don’t ever want to be jumping strings in the same fret, with the same finger. This can be problematic if we find ourselves in a situation where we have to slide down to a note and then play the note on the string above it in the same fret.
In this situation, we would aim to reposition our finger as we are doing the slide. We would start the slide with the tip of our finger and finish the slide using the pad of our finger, ready to roll our finger up to play the note on the next string.
This technique is great for getting out of a tricky situation if you realised you’ve messed up your fingering. However, it is also just a legitimate way of getting around the fretboard cleanly.

Making the most of a bad situation
Similarly to our example above, sometimes you might find yourself in a situation where you are playing a note in one fret with the tip of your finger and you realise that the next note you have to play in the string above in the same fret. This one is really tricky to execute cleanly, but if you can do it, it will definitely keep your solo sounding slick.
To do this one, you have to rotate your finger so you’re playing it horizontally on the fret, which will allow you to transfer the pressure to the pad of your finger. Once you are pressing the note with the pad of your finger, you can rotate your finger back around so it’s upright. However, now you will be playing the note with the pad of your finger, setting you up well to play the next note on the string above. The hardest part of this technique is doing the whole thing in one movement without changing the pitch of the note you are holding. It’s challenging! But if you do it well it can save your solo.
This one is a pretty interesting idea. I’ve never really thought of it or practised it intentionally, but it is something I’ve noticed myself doing on many occasions in real-life situations where I’ve messed up the fingering and need to keep playing the lick while still making sure it sounds clean.

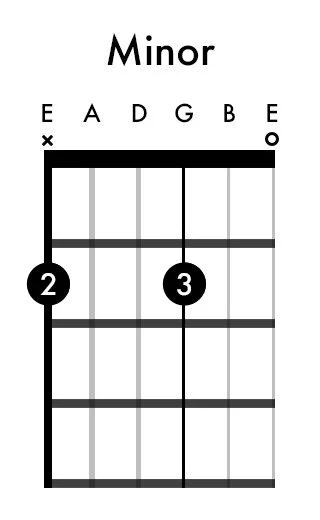
Playing chords with the side of your finger
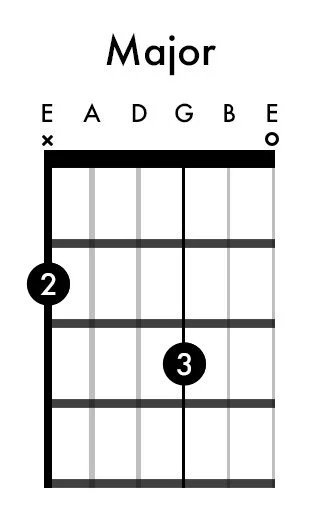
I’ve included this one more for fun than for its practical applications. However, it is still something you could legitimately use in real life if you wanted to. I was looking through a chord book once and discovered a chord that specified you were to play two notes in two different frets… with the same finger. At first I thought someone had made a mistake, but turns out it was legit. It also turned out to be the easiest way to play that particular chord. I’m not sure if it was the chord below that I saw in the chord book, but this one is an example of this technique regardless:
While there may not be any practical reason for playing a solo with one finger, it did make me think a lot more intentional about one-finger techniques that do actually have some legitimate uses in your playing. Let me know; are you doing to try some of these out? Perhaps give a one-finger guitar solo a go?