How to play: Come & Go by Juice WRLD ft. Marshmello
I’m a big fan of hip-hop and EDM music, especially when there are guitars involved! So, I was pretty much guaranteed to like the track ‘Come & Go’ by Juice WRLD featuring Marshmello. What I didn’t expect was how many interesting techniques can be incorporated into the guitar parts. Unique chord shapes, displaced rhythms, and finger-rolling are all skills we can work on with this song. Are we doing it exactly how it was played on the record? Probably not. But is the song an awesome study piece for students to use to develop their technique? Absolutely. Oh, and it’s pretty fun!
We’re going to break this song down into three main parts. The ‘intro and verse’, the ‘pre-chorus’, and the ‘lead line’. You could play the same riff from the pre-chorus in the chorus, possibly simplifying the rhythm a little. Or if you’re feeling adventurous, try some of the whammy bar abuse I use in the bonus section of the lesson video to try and sound like an aggressive dubstep bass.
Part 1: Intro and verse
The chord progression is pretty straight forward and doesn’t change throughout the whole song. However, different sections of the track do require us being able to play both bar chords and power chords. Each of these chord types has a certain vibe that helps achieve the different flavours we hear throughout the song.
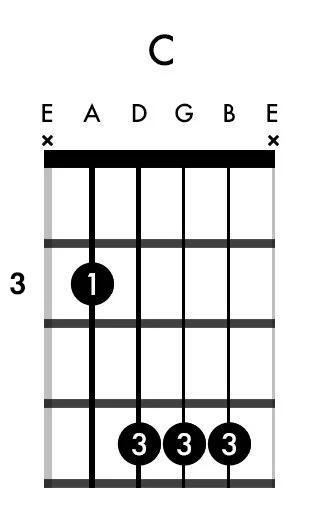
In the intro and verse sections, we will be using the full bar chord shapes.
These bar chord shapes create a problem for us, however. The riff requires us being able to play the high E string while playing a major A-shape bar chord. This is extremely impractical and pretty much impossible to play cleanly and consistently. If you do an image search for the chord, you’ll see people notate it online, indicating that you’re supposed to play the high E string. But why confuse people? Ninety-nine percent of the time, you don’t actually need to play the high E, so let’s just leave it out of our chord diagrams.
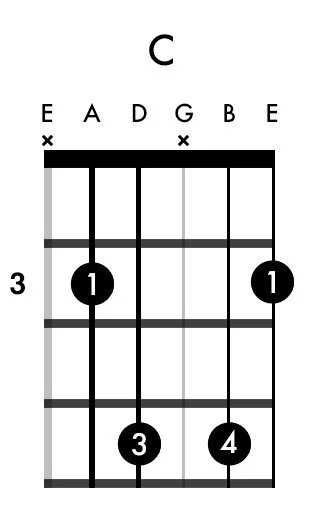
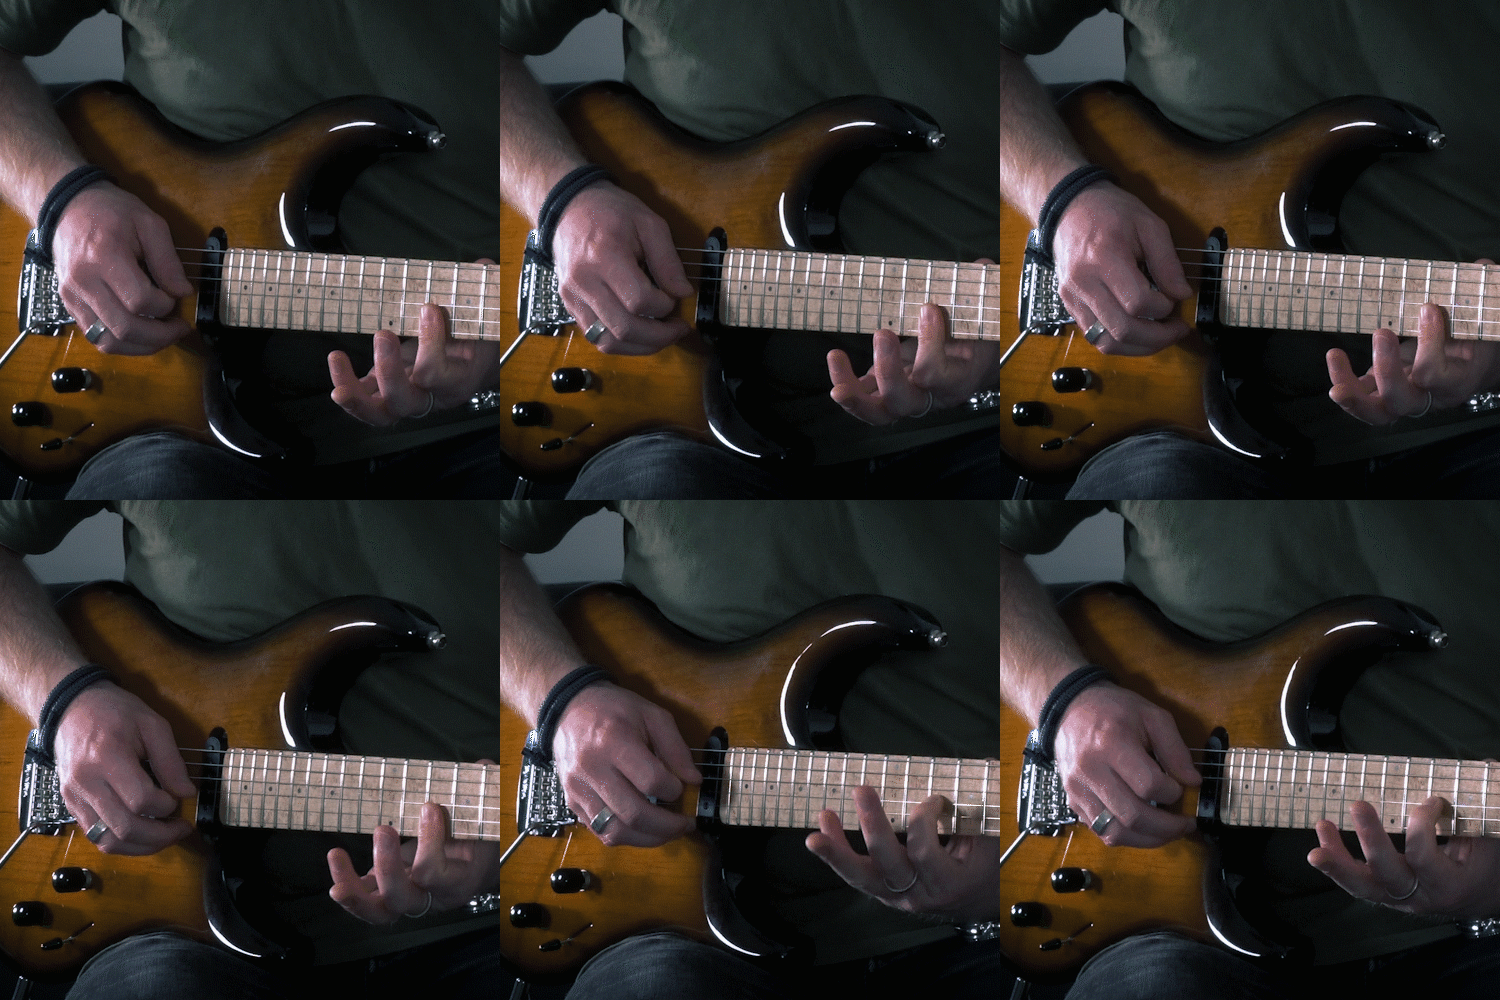
What are we going to do? We know that we need to hear the high E string in our chord, but the way we’re supposed to play it is highly impractical. The good news is that there’s actually a note in the chord which we can leave out without significantly altering the sound or function of the chord. This requires us having to use our first finger to utilise a muting technique, but allows us to play the high E string without having to resort to awkwardly playing impractical shapes.
This alternative version of a major A-shape bar chord is what we will use to play the picking part in the intro and verse.
Part 2: Pre-chorus
The chord shapes we will use for the pre-chorus are pretty straightforward. Rather than playing the full major and minor chord shapes, we’ll switch to our power chords for a more ‘rock’ sound. The challenging aspect of the pre-chorus is muted hits and rhythmic displacement we need to incorporate into the rhythm.
When we look at the chord progression, we can see that there is basically one chord per bar, but the chords in the second and fourth bars have been ‘displaced’ and brought forward by half a beat.
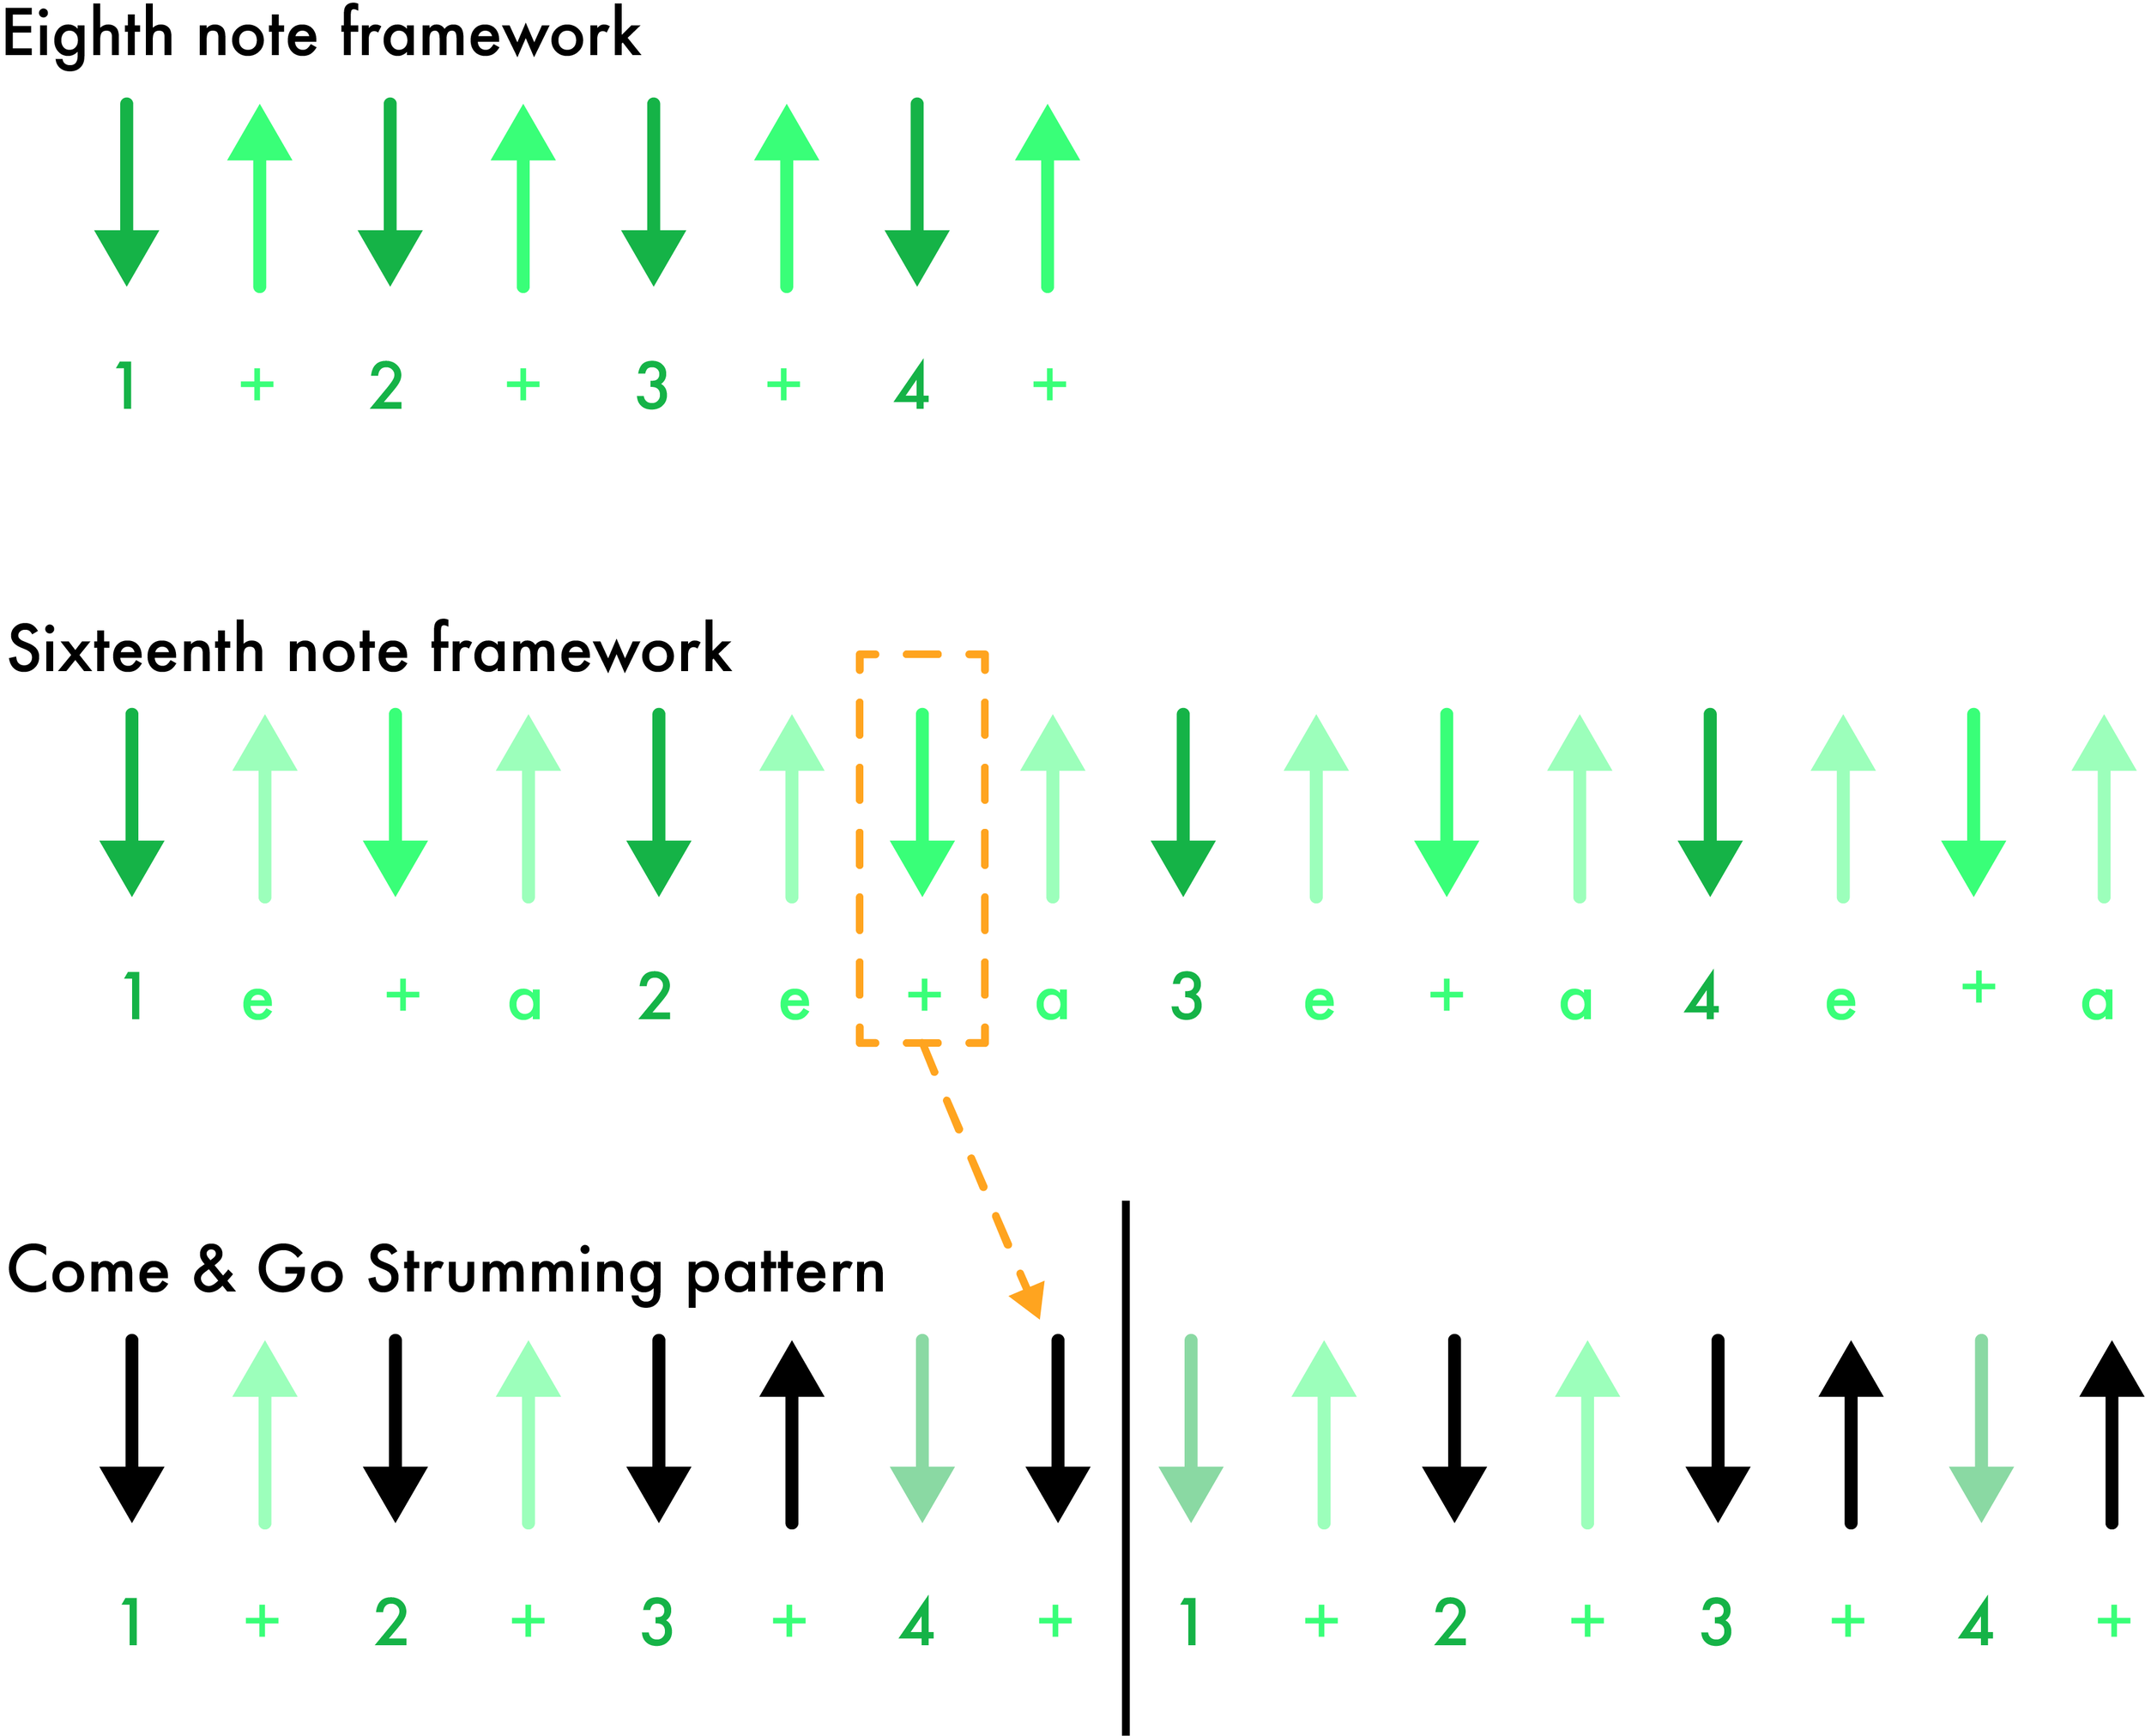
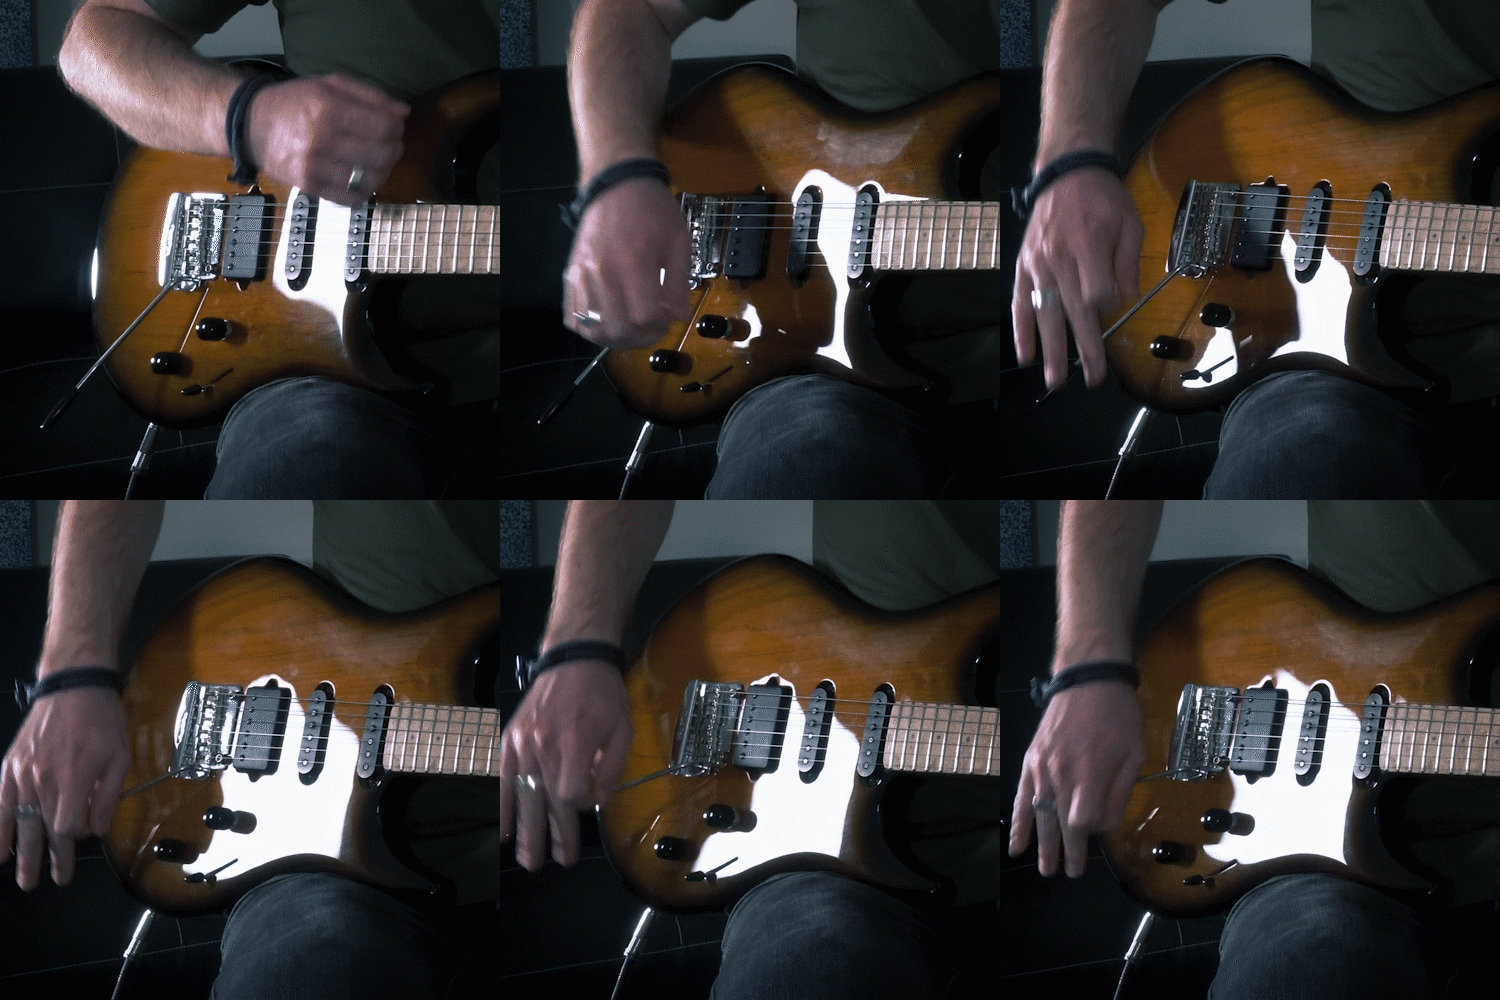
The majority of this strumming pattern uses an eighth note framework. However, it doesn’t quite feel right if we hit the next chord with an up-strum (which is what we would usually use for the off-beat of beat four in an eighth note framework). Although we’ve displaced it, we still want to hit the first beat of the chord with a strong strum. Down-strums will always have more weight to them than up-strums as we are hitting the low strings first. But in order for us to be able to play a down-strum when we hit this chord, we’ll have to borrow from a sixteenth note framework.
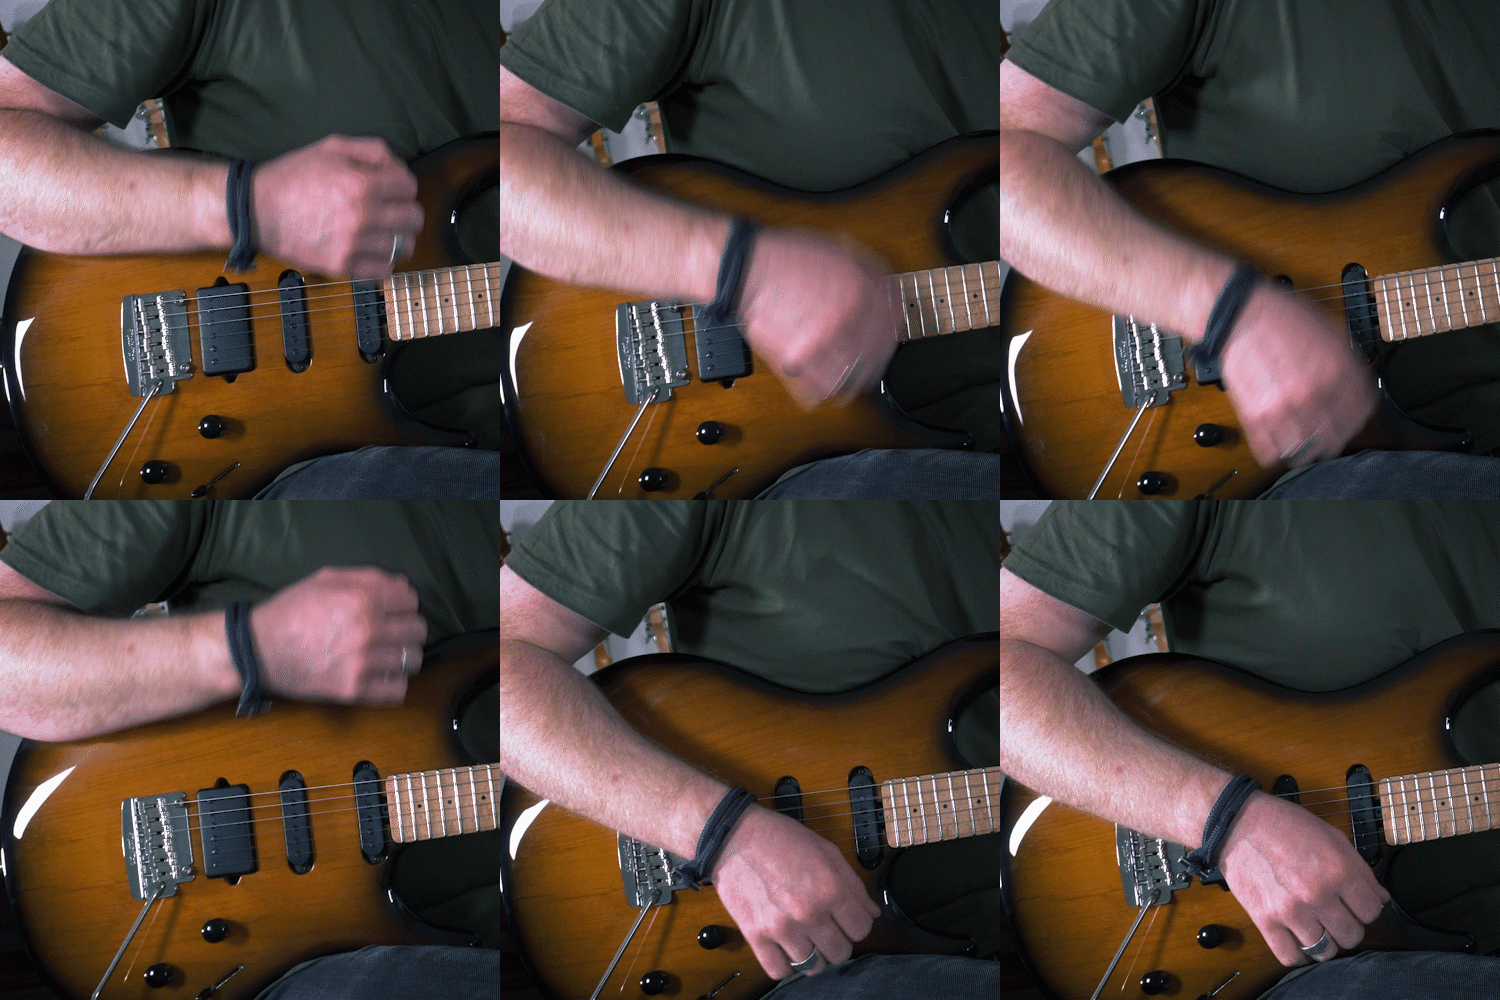
Borrowing from another framework is going to mess up the principle of constant motion, in the sense that we are no longer going to be able to move our arm up and down evenly. To hit a down-strum on the offbeat of four, we are going to have to let our arm ‘hang’ at the top of the motion. Although we are moving away from maintaining an even constant motion as we strum this, we still want to conserve our momentum. We don’t want to create a jerky movement by stopping at the top of the motion as we wait for the borrowed down-strum to come around. We can slow our movement, let it ‘hang’ at the top, but we don’t want to stop our movement completely.
This conservation of movement allows us to keep things flowing even as we move in and out of different frameworks. When we are starting out as a beginner guitarist, we want to be really strict about sticking to the framework we are in while we develop our rhythmic chops. But, as we get more advanced, we can flow in and out of strumming patterns and use the principle of constant motion a little more freely, allowing us to accent certain rhythmic hits as we did in this track.
Part 3: Lead line
I’m 99% sure that this is not how this section is played on the recording. However, we’re going to do it this way because it allows us to work on an important technique called ‘finger-rolling’. If you want to do it a different way, go for it! There are no rules when it comes to playing music.
Finger-rolling is a technique that allows us to play two notes on adjacent strings, one after the other, on the same fret. No matter how hard you try it’s impossible to play two notes like this with the same finger cleanly if you don’t use finger-rolling. There will always be a gap in the sound. It might be a small gap, but there will be a gap. And even the smallest gaps can change how we perceive a piece of music in terms of its feel (even if we can’t necessarily hear the gap). We could get rid of the gap by using two different fingers, but being able to confidently use finger-rolling gives you a lot more flexibility in different situations.
Having said all this, if you are trying to play this riff authentically, you don’t actually need to use finger-rolling. There is actually an intentional gap between the two notes in question in the song. So, what’s the point in practising it then? Even though we would not be using finger-rolling for its main benefit, in this case, it still creates (what I feel) is smoother fingering for the riff. And it’s just a good opportunity to practice the technique.
When we are doing finger-rolling, we roll our finger in such a way as to still only hear one string at a time. This isn’t a case of barring two strings with one finger and playing them so they both ring out together. We roll the finger from one string to the other in a way that mutes the one that is not being played.
In the case of this riff, when we fret a note on one string preemptively to roll down to a lower string, we do so with the flat part of our finger rather than the tip. We actually use the tip to mute the string we’re going to be going to before we need it. And, when it’s time to roll down to it, our finger has been placed so that we land perfectly using the tip of our finger on the new string. Knowing exactly how far down the tip of your finger you need to use to play the first string of the finger-roll can take some practice. If you’re still getting used to this, practising the finger-roll backwards (starting with the tip of your finger and rolling down to the flat part of your finger on the higher string above) can help. When you do this, you’ll notice where the string lands on the flat part of your finger and you can make a mental note of that position for next time.
Bonus ideas:
Come & Go by Juice WRLD featuring Marshmello is generally just a fun track to jam along to. In the lesson video, I go over some of the things I’ve been messing with just for fun. Including using my whammy bar to do some crazy portamento between the chords. And, using my whammy bar aggressively in the chorus to try and make my guitar wobble like a dubstep bass. Basically… I just want to be a synth.
Have you tried any of these techniques before? Are you going to give this song a go? Comment and let me know which of three parts we’ve looked at is your favourite to play!


